Enumerate Serial Ports Vb6 Code Compare
NET: Serial ports provide an easy way to communicate between many types of. In this tutorial are in C#, but can be easily transferred to Visual Basic, or Visual C. You can find the full list of constructors in the link in the intro. For this reason we want to write our code for the serial port within a try – catch block.
ActiveXperts Serial Port Component is a software development kit (SDK) that enables the user to communicate to a device over a serial interface.
Such a device can be: a weight indicator, a modem, a scanner, or any other device that is equiped with a serial port. It can even be another PC, connected via a NULL modem cable.
ActiveXperts Serial Port Component features the following:
- Direct COM port support (like 'COM1')
- TAPI (Windows Telephony Device) support (like 'Standard 56000 bps Modem');
- Support for RS-232/RS422/RS485, up to 256 simultaneous ports;
- Support for all types of Hayes compatible modems;
- Support for serial cable as well as USB cable or Bluetooth connections;
- Support for Virtual COM ports (i.e. COM ports redirected through the network);
- Hardware flow control (RTS/CTS, DTR/DSR) and software flowcontrol (XON/XOFF) support;
- Configurable baudrate/parity/stopbits, full buffered data transfer, text/binary data transfer.
Serial Port Component can be well integrated into .NET environments.
This document describes how the ActiveXperts Serial Port Component can be integrated into into Visual Basic .NET projects.
Step 1: Download and install the ActiveXperts Serial Port Component
Download the the ActiveXperts Serial Port Component from the ActiveXperts Download Site and start the installation. The installation guides you through the installation process.
Step 2: Create a new Visual Basic .NET Project
Launch Microsoft Visual Studio (for instance 'Microsoft Visual Studio 2005') from the Start menu. Choose 'New' from the 'File' menu and click on 'Project'. In the 'New Project' dialog, select a Visual Studio template (for instance: 'Console Application'). Select a name for the application (for instance: 'DemoApp') and a name for the solution (for instance: 'DemoSolution'). Also, select the directory where you want to store the project (for instance: 'C:MyProjects):
Step 3: Refer to the ActiveXperts Serial Port Component Library and create the objects
Now that a new project has been created, you must add a reference to the ActiveXperts Serial Port Component in the project to be able to use the the ActiveXperts Serial Port Component object. To do so, choose 'Add Reference..' from the 'Project' menu. In the 'Add Reference' dialog that pops up, select the 'COM' tab and select the 'Serial Port Component 2.2 Type Library' as shown in the following picture:
(Click on the picture to enlarge)
Click 'OK' to close the 'Add Reference' dialog.
On top of your code, type the following line to use the ActiveXperts Serial Port Component namespace:
In your Main function, declare and create the following object:
Step 4: Send an AT command to a connected Hayes compatible modem
You can now send and receive data to and from a serial interface.
The following code shows how to query a modem:
There are many working samples included with the product. You can also find them on the ActiveXperts FTP site: ftp.activexperts-labs.com/samples/serial-port-component.
Introduction
One subject that seems to be discussed very little on the MSDN and on other VB sites is the COM port, and how to use it in Visual Basic. Therefore, in this tutorial, we will discuss detecting the available COM ports, and using the Microsoft COMM control to communicate with COM ports.
Finding the available com ports
You do not actually need to check the availability of the COM ports, as you get an Err 8002. Invalid port number Error, which you can detect and display to the user. However, using this method, you can display a drop down to the user, listing all the available COM ports, rather than the 16 possible COM ports, most of which are actually unavailable. Firstly, copy the following code into a module in your project.
'// API Declarations
 Public Declare Function CreateFile Lib 'kernel32' Alias 'CreateFileA' (ByVal lpFileName As String, ByVal dwDesiredAccess As Long, ByVal dwShareMode As Long, lpSecurityAttributes As SECURITY_ATTRIBUTES, ByVal dwCreationDisposition As Long, ByVal dwFlagsAndAttributes As Long, ByVal hTemplateFile As Long) As Long
 Public Declare Function CloseHandle Lib 'kernel32' (ByVal hObject As Long) As Long
 '// API Structures
 Public Type SECURITY_ATTRIBUTES
 nLength As Long
 lpSecurityDescriptor As Long
 bInheritHandle As Long
 End Type
 '// API constants
 Public Const FILE_SHARE_READ = &H1
 Public Const FILE_SHARE_WRITE = &H2
 Public Const OPEN_EXISTING = 3
 Public Const FILE_ATTRIBUTE_NORMAL = &H80
 '// Return TRUE if the COM exists, FALSE if the COM does not exist
 Public Function COMAvailable(COMNum As Integer) As Boolean
 Dim hCOM As Long
 Dim ret As Long
 Dim sec As SECURITY_ATTRIBUTES
 '// try to open the COM port
 hCOM = CreateFile('.COM' & COMNum & ', 0, FILE_SHARE_READ + _
 FILE_SHARE_WRITE, sec, OPEN_EXISTING, FILE_ATTRIBUTE_NORMAL, 0)
 If hCOM = -1 Then
 COMAvailable = False
 Else
 COMAvailable = True
 '// close the COM port
 ret = CloseHandle(hCOM)
 End If
 End Function
Then, use the code below to go through all the possible COM ports, and find if they are available or not. This code presumes that you have a Combo box named cboComm.
Private Sub ListComPorts()
 Dim i As Integer
 cboComm.Clear
 For i = 1 To 16
 If COMAvailable(i) Then
 cboComm.AddItem i
 End If
 Next
 cboComm.ListIndex = 0
 End Sub
The MSComm Control
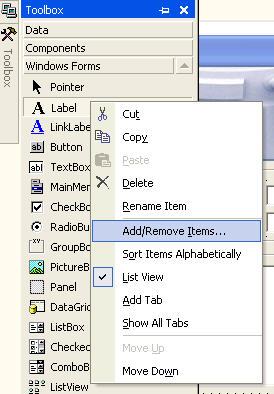
The next section of this tutorial will show you how to use the MSComm control. To add this control to your project, display the Components dialog (Project Components..). Then scroll down, and check the box next to the Microsoft Comm Control. This control will only be available if you have Visual Basic Professional or above.
The Communications control provides an interface to a standard set of communications commands. It allows you to establish a connection to a serial port, connect to another communication device (a modem, for instance), issue commands, exchange data, and monitor and respond to various events and errors that may be encountered during a serial connection.
Possible Uses
- To dial a phone number.
- To monitor a serial port for incoming data.
- To create a full-featured terminal program.
There are a number of sample applications that use the MSComm control. There are the the Dialer.vbp (in the Dialer folder) and VBTerm.vbp (in the MSComm folder) sample applications which are listed in the samples directory, demonstrate simple and complex (respectively) programming techniques of the Communications control. These are also available for download here. There is also another VB Web example, which you can download here. A screen shot is below.
MSComm Control Settings
There is quite a large number of settings for the Comm Control, none of which are really explained in the Visual Basic help.
Settings
The first property that you can set is the Settings property(!). The Settings property allows you to specify the baud rate, parity, and the number of data bits and stop bits. By default, the baud rate (which is the maximum speed of the COM port) is set at 9600. The parity setting is for data validation. It is commonly not used, and set to 'N'. The data bits setting specifies the number of bits that represent a chunk of data. The stop bit indicates when a chunk of data has been received.
The settings string takes the following format.
'BBBB,P,D,S'Where BBBB is the baud rate, P is the parity, D is the number of data bits, and S is the number of stop bits. The default value of value is:
'9600,N,8,1'If the settings property is invalid when you attempt to open the port, an error 380 (Invalid property value) occurs.
Buffer Memory Allocation
The InBufferSize and OutBufferSize properties specify how much memory is allocated to the receive and transmit buffers (which store the in-coming and out-going data). The larger you make the number, the less memory you have available to your application. If, however, your buffer is too small, you run the risk of overflowing the buffer unless you use handshaking.However, given the amount of memory available to most PCs at this time, buffer memory allocation is less crucial because you have more resources available. In other words, you can set the buffer values higher without affecting the performance of your application.
The RThreshold and SThreshold Properties
The RThreshold and SThreshold properties set or return the number of characters that are received into the receive and transmit buffers before the OnComm event is fired. The OnComm event is used to monitor and respond to changes in communications states. Setting the value for each property to 0 (which is the default value) prevents the OnComm event from firing. Setting the value to something other than 0 (1, for instance) causes the OnComm event to be fired every time a single character is received into either buffer.
The InputLen and EOFEnable Properties
Setting the InputLen property to 0 causes the Communications control to read the entire contents of the receive buffer when the Input property is used. When reading data from a machine whose output is formatted in fixed-length blocks of data, the value of this property can be set appropriately.
The EOFEnable property is used to indicate when an End of File (EOF) character is found during data input. Setting this to True causes data input to stop and the OnComm event to fire to inform you that this condition has occurred.
The InputMode Property
The InputMode property determines how data will be retrieved through the Input property. This data will either be a string (plain text), or as a byte array (binary data). Use comInputModeText for data that uses the ANSI character set (plain text). Use comInputModeBinary for all other data such as data that has embedded control characters, Nulls, etc.
Sending Data
For this example to work, ensure that the following properties are set.
| Property | Value |
| RThreshold | 1 |
| SThreshold | 1 |
| InputLen | 0 |
| ComPort | The location of your modem |
After this, firstly, we need to open the COM port. To do this, simply set the PortOpen property to true:
MSComm1.PortOpen = True
Then, we need to send the command. For this example, we will ask your modem to dial your own number. So, the command will be

ATDT01992245365
AT tells the modem that a command is coming up. DT tells it to dial the upcoming number using Tone dial. Then the text in red is the number to dial. Change the number in red to your own number. We also need to add a Chr$(13) after the command. You nearly always need to do this. So, to send this command, we enter
MSComm1.Output = 'ATDT01992245365' & Chr$(13)
You could of course, substitute the telephone number with a Text box, so that the user could enter the number:
MSComm1.Output = 'ATDT' & txtNumber.Text & Chr$(13)
Then, the modem will attempt to dial the number. If you want a list of the main commands to control a modem, click here. Of course, if the device connected to the COM port is not a modem, you will need to know what commands to send it.
At the moment, we have no way of knowing if the dialing was successful. This is where the OnComm event is useful. This is discussed in the next section.
Receiving Data
To receive data, you need to check the Input property. However, the problem is, knowing when the data is there. This is because the data only stays in the Input property for a few seconds. I find that the OnComm event is the best way to do this. In order for the OnComm event to fire, you need to set RThreshold and SThreshold to 1. So, to get the result of the command we sent the modem in the last section, we need the following code to be inserted into the OnComm event:
Select Case MSComm1.CommEvent
 ' Event messages.
 Case comEvReceive
 txtOutput.Text = txtOutput.Text & StrConv(MSComm1.Input, vbUnicode)
 EndSelect
This checks to see what event has just occured. If it was a receive event, we add the contents of the Input property to the end of the txtOutput textbox. When we send the command above, we should receive something like
ATDT01992245365
 BUSY
Auto B V3 Download; Auto B V3; Grand Theft Auto V Update 2 and Crack v3 2015 - Los Santos: a sprawling sun-soaked metropolis full of self-help gurus, starlets and fading celebrities, once the envy of the Western world, now struggling to stay afloat in an era of economic uncertainty and cheap reality TV. GET auto b+ v3 crack Download Free windows8 7 xp pc Thirty-one May 2014 Saturday Share For Fast Transfer. Get auto b v3 crack download. Size of this File: 7MB. Available Download Servers are Georgia,Guernsey,Bosnia,Uruguay,Belgium,Central African Republic. Auto b v3 cracked.
The first line is our command echoed back at us. The next is the result of the dial, in this case Busy (because we were dialing our own number). On my modem, you can turn the command echo off by sending ATE0. For a list of other commands, click here.
You can also use the OnComm event to monitor other communication events or errors. Because communications (especially over telephone lines) can be unpredictable, trapping these events and errors allows you to respond to them appropriately.
The following table lists the communication events that will trigger the OnComm event. The values will then be written to the CommEvent property.
| Constant | Value | Description |
| comEvSend | 1 | There are fewer than SThreshold number of characters in the transmit buffer. |
| comEvReceive | 2 | Received RThreshold number of characters. This event is generated continuously until you use the Input property to remove the data from the receive buffer. |
| comEvCTS | 3 | Change in Clear To Send line. |
| comEvDSR | 4 | Change in Data Set Ready line. This event is only fired when DSR changes from 1 to 0. |
| comEvCD | 5 | Change in Carrier Detect line. |
| comEvRing | 6 | Ring detected. Some UARTs (universal asynchronous receiver-transmitters) may not support this event. |
| comEvEOF | 7 | End Of File (ASCII character 26) character received. |
The OnComm event is also triggered, and a value is written to the CommEvent property, when the following errors are encountered.
| Setting | Value | Description |
| comEventBreak | 1001 | A Break signal was received. |
| comEventFrame | 1004 | Framing Error. The hardware detected a framing error. |
| comEventOverrun | 1006 | Port Overrun. A character was not read from the hardware before the next character arrived and was lost. |
| comEventRxOver | 1008 | Receive Buffer Overflow. There is no room in the receive buffer. |
| comEventRxParity | 1009 | Parity Error. The hardware detected a parity error. |
| comEventTxFull | 1010 | Transmit Buffer Full. The transmit buffer was full while trying to queue a character. |
| comEventDCB | 1011 | Unexpected error retrieving Device Control Block (DCB) for the port. |